Introduction
Looking for a smart and eco-friendly way to reduce kitchen waste and help your garden thrive? You’re in the right place! In this blog post, we’re diving into a fun and practical project: Homemade compost bin DIY.
Making your own compost bin at home is easier than you might think — and you don’t need any fancy tools or expensive materials. Whether you live in a house with a backyard or an apartment with a balcony, you can start composting today. It’s a great way to recycle food scraps, improve your soil, and do your part for the environment.
What is Homemade Compost Bin DIY?

Homemade compost bin DIY is a do-it-yourself method of creating your own compost bin using simple materials you probably already have at home. Instead of buying a store-bought compost system, you build one yourself — usually with items like a plastic bin, bucket, or wooden box.
The goal is to create a space where food scraps, yard waste, and other natural materials can break down over time and turn into rich, healthy compost. This compost can then be used to feed your plants, flowers, or garden — completely free and chemical-free.
It’s a budget-friendly, beginner-friendly way to start composting, and it’s perfect for anyone who wants to live more sustainably without spending a lot of money.
You May Also Like It:
How to Protect Trees During Storms – Essential Tips for Tree Safety
How to Spot Overwatering vs Underwatering: Key Plant Care Signs
Plant Nutrition & Fertilizer Guide | Essential Tips for Healthy Growth
Why Is Homemade Compost Bin DIY Important?
Creating your own compost bin at home isn’t just a fun weekend project — it’s a smart step toward a more sustainable and cost-effective lifestyle. Here’s why it matters:
Reduces Household Waste
Less Garbage to Landfills
Composting keeps food scraps and yard waste out of the trash, reducing the amount of waste sent to landfills.
Turns Trash into Treasure
Instead of throwing away kitchen scraps, you convert them into valuable compost for your garden or plants.
Cuts Down on Plastic Bag Use
By generating less trash, you’ll use fewer garbage bags, helping to reduce plastic waste overall.
Improves Garden and Soil Health
Adds Nutrients to the Soil
Homemade compost is packed with nutrients that boost soil health and help plants grow stronger.
Boosts Soil Structure
Compost improves the texture of soil, helping it retain moisture and support healthy root growth.
Natural Alternative to Chemical Fertilizers
It replaces synthetic fertilizers with an organic option that’s safer for the environment and your crops.
Saves Money and Resources
No Need for Store-Bought Compost
Making compost at home eliminates the need to buy it from gardening stores.
Reuses Items You Already Have
You can build a compost bin from everyday materials like old bins or buckets, saving money on supplies.
Reduces Utility and Trash Fees
Composting leads to less trash and better soil, which can save on disposal costs and garden maintenance.
Encourages a Greener Lifestyle
Promotes Eco-Friendly Habits
Composting is an easy way to start living sustainably and making environmentally conscious choices.
Gets the Whole Family Involved
It’s a great activity to teach kids and adults about recycling, waste, and how nature works.
Builds Awareness About Waste
Composting makes you more mindful of food waste and packaging, encouraging better habits overall.
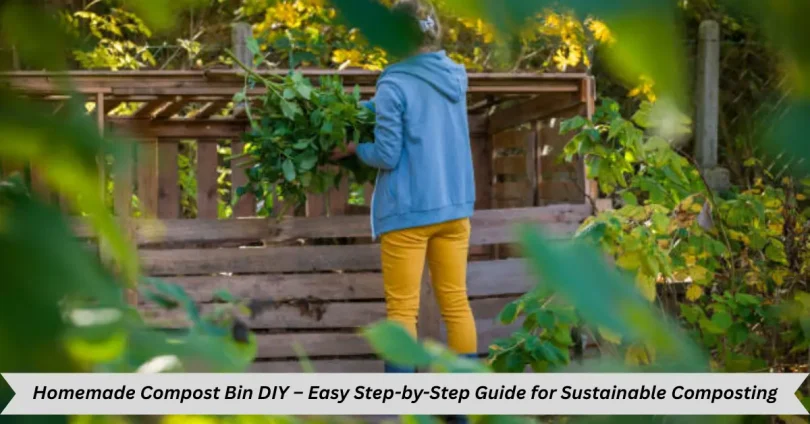
Step-by-Step Guide: Homemade Compost Bin DIY (June 2025)

Creating your own compost bin is a practical and sustainable way to manage kitchen and garden waste. With just a few household materials and a little effort, you can start producing rich, organic compost to nourish your plants and reduce landfill waste.
What You’ll Need
- 1 plastic storage bin with a tight-fitting lid (18–30 gallons)
- A drill or screwdriver
- Bricks or wood blocks (for elevation)
- Dry leaves, shredded newspaper, or cardboard (carbon source)
- Kitchen scraps (vegetable peels, fruit waste, coffee grounds)
- Garden waste (twigs, grass clippings, a small amount of soil)
Step 1: Choose a Suitable Container
Select a sturdy plastic bin with a lid. A dark-colored bin is ideal, as it absorbs heat and speeds up the composting process. Choose a size based on your household’s waste volume—18 to 30 gallons works well for most households.
Step 2: Drill Ventilation Holes
Use a drill or screwdriver to create ventilation and drainage:
- Drill 10–15 holes in the lid for airflow.
- Drill 6–10 holes on each side of the bin to allow oxygen in.
- Drill 6–8 holes in the bottom for drainage to prevent waterlogging.
Proper airflow and drainage help prevent bad odors and support decomposition.
Step 3: Elevate the Bin
Place the bin on bricks, wooden blocks, or plant pot stands to lift it off the ground. Elevating the bin promotes air circulation and allows excess moisture to drain out from the bottom.
Step 4: Create a Carbon-Rich Base Layer
Add a few inches of shredded newspaper, cardboard, or dry leaves at the bottom of the bin. This layer helps absorb excess moisture and provides essential carbon for balanced composting.
Step 5: Add Kitchen and Garden Waste
Start adding your waste in alternating layers:
- Greens (nitrogen-rich): Fruit and vegetable scraps, coffee grounds, tea bags
- Browns (carbon-rich): Dry leaves, paper, cardboard, straw
Maintain a 3:1 ratio of browns to greens to keep the compost balanced and odor-free.
Step 6: Mix and Maintain the Compost
Every 3 to 5 days:
- Stir or turn the compost with a stick or garden fork to introduce oxygen.
- Check moisture levels—compost should be damp but not soggy.
- Add more browns if the mix is too wet, or sprinkle water if it’s too dry.
Regular mixing helps speed up decomposition and prevents unpleasant smells.
Step 7: Keep Adding Material
Continue to add waste regularly. Cut large pieces into smaller bits to accelerate breakdown. Always cover fresh food waste with a layer of browns to deter pests and control odor.
Step 8: Monitor the Process
Over time (typically 4 to 8 weeks):
- The pile will shrink in volume.
- The material will darken and become crumbly.
- You’ll notice a rich, earthy smell.
This indicates your compost is nearly ready.
Step 9: Harvest the Compost
When the compost is fully broken down:
- Scoop out the finished compost for your garden or potted plants.
- Sift out any larger pieces and return them to the bin for further decomposition.
Advantages and Disadvantages of a Homemade Compost Bin
Creating a compost bin at home is an effective way to manage organic waste and support a more sustainable lifestyle. However, like any DIY project, it comes with its pros and cons.
| Advantages | Disadvantages |
| Cost-Effective Homemade compost bins can be built using inexpensive or recycled materials like old storage bins, buckets, or crates—eliminating the need to purchase commercial compost systems. | Time and Maintenance Required Homemade compost bins require regular attention—turning, moisture checks, and monitoring for balance. Neglect can lead to odors or pests. |
| Reduces Household Waste A large portion of kitchen and yard waste is compostable. Composting helps divert this waste from landfills, reducing overall garbage output. | Slower Decomposition Without insulation or aeration features found in commercial bins, decomposition in homemade bins may take longer, especially in cooler climates. |
| Improves Soil Health Homemade compost enriches soil with nutrients, improves structure, and enhances moisture retention—ideal for gardens, lawns, and potted plants. | Odor and Pest Risk If not properly managed, compost can emit unpleasant smells or attract insects and rodents, particularly in urban or small-space settings. |
| Environmentally Friendly Composting reduces methane emissions from landfills and lowers your carbon footprint, making it a simple yet powerful climate action. | Limited Volume Most DIY bins are small or medium-sized, which may not accommodate large volumes of waste or support large-scale gardening needs. |
| Customizable You can design and size the bin to suit your space, whether you live in an apartment, townhouse, or rural area. | Aesthetic Concerns Homemade compost bins might not look as tidy or appealing as store-bought ones, especially if placed in a visible area like a balcony or patio. |
You May Also Like It:
Common Tree Diseases and Effective Treatment Methods – Tree Care Guide
Best Time to Trim Trees – Seasonal Guide for Healthy Growth
How to Keep Indoor Plants Healthy | Essential Tips for Thriving Houseplants
Common FAQs About Homemade Compost Bin
What is a compost bin?
A compost bin is a container where you put food scraps and yard waste. Inside, these materials break down naturally to become healthy soil called compost.
Why should I compost at home?
Composting helps reduce trash, saves money, and makes great fertilizer for your plants. It’s good for the environment and your garden!
What can I put in my compost bin?
You can add fruit and vegetable scraps, coffee grounds, eggshells, dry leaves, shredded paper, and small garden clippings. Avoid meat, dairy, and oily foods.
How often should I turn my compost?
Try to stir or mix your compost every 3 to 5 days. This helps air get in and speeds up the breakdown process.
How long does it take for compost to be ready?
Usually, compost takes about 1 to 3 months to turn into dark, crumbly soil, depending on how often you turn it and the materials used.
Why does my compost smell bad?
Bad smell usually means it’s too wet or there’s not enough air. Add dry leaves or shredded paper and stir it more often.
Can I compost in an apartment?
Yes! Use a small bin with a lid and charcoal filter to control odors. You can also try worm composting (vermicomposting) if you have limited space.
Conclusion
Making your own compost bin at home is easy and helps the planet. It turns food scraps and garden waste into healthy soil for your plants. With a little time and care, you can reduce trash, save money, and grow a greener garden. Start small, keep it simple, and enjoy the benefits of homemade compost.
Bonus Points for Your Homemade Compost Bin
- Use a Compost Thermometer: A simple tool to check if your compost is hot enough for fast breakdown.
- Chop Waste Into Smaller Pieces: Smaller scraps break down quicker and help speed up composting.
- Add Worms: Earthworms naturally help decompose material faster and improve soil quality.
- Keep a Compost Journal: Track what you add and how often you turn the bin to improve your process over time.
- Use Finished Compost as Mulch: Spread it around plants to keep soil moist and reduce weeds.
- Avoid Adding Diseased Plants: This helps keep your compost and garden healthy.
- Use Coffee Grounds for Nitrogen: They are great for compost and help keep pests away.
- Avoid Adding Meat or Dairy: These can attract pests and cause bad smells.
- Add a Layer of Soil Occasionally: This introduces helpful microbes to speed up decomposition.
- Keep Your Bin in a Sunny Spot: Warmth helps speed up the composting process.
You May Also Like It:
Tree Pruning Tips for Beginners – Easy Guide to Healthier Trees
Why Your Plant Leaves Are Turning Yellow | Common Causes & Easy Fixes
Natural Remedies for Plant Pests | Eco-Friendly Pest Control Tips 2025
How to Care for Trees in Your Backyard – Tree Maintenance Tips 2025